Saturday, March 30, 2013

Baklava Rolls
with Pistachios, Walnuts and Almonds


I'm celebrating today! Celebrating 200 'likes' on the Greek Vegetarian Facebook page! And I truly can't think of a more delightful little celebratory sweet to make on such a happy day than baklava. My Aunt Koula's baklava no less.

Koula's recipe was passed down to her by her mother and is a variation on the traditional squared or triangle-shaped pieces of baklava – the baklava is rolled into logs then cut diagonally. Koula says it's much quicker to make baklava this way. It also uses a mixture of three different nuts, including pistachios which are not often seen in Greek baklava recipes.

I briefly introduced you to my Aunt Koula in an earlier post, but here I would like to tell you a little more about this remarkable, beautiful and incredibly funny woman who wears a pair of Nana Mouskouri glasses better than Nana herself.


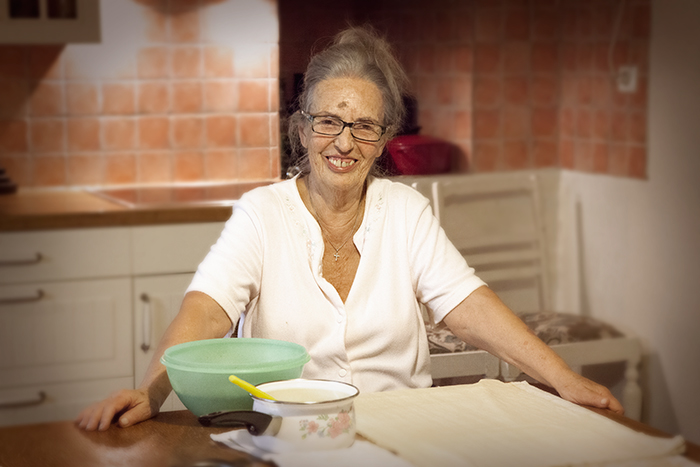
I first met Koula around 15 years ago when my sister, Melinda, and I were holidaying together in Greece. Koula and her husband (my dad's brother) George, live in Rhodes, a Greek island in the far southeast of the Aegean Sea. On that trip we only had a few days to spend with George and Koula, but the one thing both Melinda and I took away with us was the vivid memory of Koula's wonderful cooking.

It wasn't until Tony and I started spending some time in Limnos that we got to know Koula and George more intimately. Both now in their 80s, they make their annual pilgrimage to the cooler island of Limnos during the summer months when it is too hot for them to swelter away in Rhodes.

Tony and I have been fortunate enough to spend a few weeks each year in Limnos for the last three years, and this is when we get to enjoy quality time with George and Koula, as well as with my dad and his wife Julia who live in Limnos for 6 to 8 months every year.


Not having many relatives here in Australia, it is really lovely to connect with family in the country of my roots. It's quite a spiritual experience for me every year. The moment the plane touches down at Eleftherios Venizelos airport in Athens, a wave of emotion hits me and I just want to applaud the way passengers used to in the early days when Olympic Airways had international flights from Australia to Greece. Back then it was more of a gesture of appreciation (and relief!) that the pilot landed the plane safely, but for me, now, I just want to express my joy that I'm in Greece! Last year I broke out into my own solo performance of applause, and actually started a bit of a crowd response where around 30 people joined me, and some even threw in a few "bravos"!

Over the years Tony's connection with Greece has also strengthened. He hasn't a drop of Greek blood in him but his affinity with the country and the culture of Greece is quite phenomenal. He has been learning the language for the last three years and is now almost fluent. I hardly speak Greek at all which, as you can imagine, is actually quite embarrassing for the one that's meant to be the Greek component of this partnership – especially when we're in Greece!

Arriving at the family house in Limnos is always an emotional moment, seeing how much the garden has grown, and finding George and Koula in the same seats out in the terrace where they always sit, tossing their comboloi (worry beads) and grinning from ear to ear as they see us approaching. Big, giant hugs and kisses, tears and laughter, Koula's hands holding my face, then another big kiss and a hug. It's the most beautiful welcome you could hope for in such a beautiful country.


During the last three years, for just a few weeks every year, Tony and I have got to know a wonderful aunt and uncle that would make us laugh every day. Koula has a very dry sense of humour, ensuring she never laughs at her own jokes. Her English is good, but she would occasionally get the genders confused in our language, as many native Greeks do, and her humour would take on another dimension when she would refer to "her" as "him", as in "I was talking to my daughter-in-law, Kathleen, and I said to him, "Why you no come to Greece?". Tony would be in tears of laughter and although Koula may not have known exactly why, true to form, she would not laugh, and casually carried on with the story.

Memorable also is Koula's cooking. She is the queen of the kitchen and would prepare a meal of gargantuan proportions every day for lunch, and another three meals every day for the freezer. In Limnos everyone is well fed with Koula's dishes, long after she and George have returned to their homeland of Rhodes.

I love spending time in the kitchen with Koula and take every opportunity I can to document everything she cooks, including this baklava recipe that I'm sharing with you today.

I've tried to make Koula's baklava many times and it still doesn't come out the way she does it. Why is that?! This year when we meet again in August I will ask her to observe every move of mine as I try to replicate her baklava and hopefully we'll see where I go wrong . . .


Baklava Rolls, with Pistachios, Walnuts and Almonds

Recipe by my Aunt Koula

Makes around 40 small portions

Ingredients

  • 200g walnuts
  • 150g almonds
  • 60g pistachios
  • 1/2 teaspoon cinnamon
  • 200g unsalted butter
  • 12 sheets of filo pastry
For the syrup
  • 2 cups sugar
  • 1 cup water
  • 2 tablespoons lemon juice
  • 2 tablespoons Greek honey

Instructions

  1. Place the nuts in a food processor or grinder and pulse until broken down to coarse crumbs.
  2. Add the cinnamon to nut mixture and mix well.
  3. Melt the butter over low heat for brushing the filo pastry.
  4. Lay one sheet of pastry on a flat surface and butter liberally.
  5. Sprinkle a handful of the nut mixture evenly over the pastry.
  6. Repeat with two more sheets of pastry, finishing with the nut mixture.
  7. Carefully roll the pastry, not too tightly, until you have a log shape, and place with seal side down in a baking dish.
  8. Create three more rolls and lay side by side in the baking dish. You should still have at least 1/4 cup of melted butter left. Reserve this butter for the final brushing.
  9. Using a sharp knife, cut the baklava rolls diagonally, almost all the way down to the bottom of the dish, but not touching the bottom, to create around 40 portions.
  10. Brush the baklava with the remaining butter and place in a preheated oven at 170 degrees celsius for one hour.
  11. In the last 30 minutes of cooking time, create the syrup. Combine the water, sugar and lemon juice in a pan and heat until boiling. Allow to boil for 10 minutes without stirring, then add honey and stir to mix in. Remove from heat.
  12. Remove baklava from the oven and pour hot syrup directly over the hot baklava. It will sizzle a bit, but this is the all-important moment when the syrup goes all gooey and sticky, crisping up the pastry and doing all sorts of magical stuff.

As delicious as your baklava looks, you will need to allow it to sit, uncovered, for at least an hour before eating so the syrup can penetrate the pastry and do its crisping-up thing. To serve, arrange three pieces on a plate and sprinkle with ground almonds . . . and just try and stop at three.


Linking back to Fig and Cherry's blog this week on her "This week I'm craving..." weekly post. It's a fun, new way to link up with others that have food cravings (like my carb craving after going a week without them!)

Wednesday, March 27, 2013

Hommus, Hummus, Homous

So many ways to say it, so many ways to make it.
But today I'm going to share with you, my Dad's way.


My father, Takis, is a bit of a mad professor when it comes to experimenting with food. He will spend weeks, if not months, perfecting a particular creation in the kitchen. Even something as simple as hommus. No matter what he's making, he will go to whatever length it takes to make sure the flavour, the texture and the aroma is tweaked and refined to absolute perfection.

But only Takis knows when it's perfect. He may use other people as guinea pigs in the process, but like many proud Greeks, my dad doesn't want to hear your opinion unless it's a favourable one. Even if he asks you "Do you like it?", you mustn't answer. Takis is the only one that can criticise his own food and will make sure he immediately responds to his own question with "It needs more lemon doesn't it". Only then can you speak, and you have two choices: Reluctantly agree with him or tell him "It's great the way it is!"

The process of formulating the ultimate hommus recipe was (and still is!) an enjoyable one for Takis. Around ten years in the making, just about every time we were invited over for lunch there would be another version of hommus for us to try. My proud dad in his favourite I Love Limnos apron, bowl in one hand, spoon in the other (actually, spoon in our face) would encourage us to taste "Here, you must try. Please. This one is very good." As they all were.


There's nothing rocket-scientific about my dad's recipes. He just loves any excuse to spend time in the kitchen making food that makes people happy. And if perfecting a simple dish means another marathon session in the kitchen, then out comes the Limnos apron again. But once dad is finally happy with his creation, you'd better be sure you love it too, because if you don't love dad's food, there won't be a lot of love for you.

So when making hommus, the big tip from Takis is to use dried chickpeas soaked in water overnight, rather than canned. But one big problem comes with this big tip. If you are using dried chickpeas, you have to remove their skins which is a somewhat tedious process. It's worth it though because dried chickpeas give a much "fresher" flavour (in my dad's own words) to your hommus.


Hommus, Hummus, Homous

Recipe by Takis (my dad)

Ingredients

  • 200g dried chickpeas (soaked in water overnight)
  • 1 clove of garlic, crushed
  • 3 tablespoons tahini
  • 3 tablespoons extra virgin olive oil
  • 3 tablespoons lemon juice
  • 1 teaspoon ground cumin
  • 1/4 teaspoon salt
  • Extra salt to taste

Instructions

  1. Drain the soaked chickpeas, rinse and transfer to a large pot.
  2. Cover the chickpeas with plenty of water and bring to the boil.
  3. Allow to cook for 30 minutes, then drain and transfer chickpeas to a large bowl of cold water.
  4. Remove skins from the chickpeas by lightly squeezing them one by one between your fingers. The skins should come off easily. Discard skins and throw skinned chickpeas back into the saucepan you used earlier to cook them.
  5. Cover chickpeas with water again and boil for another 30–45 minutes, until very soft.
  6. Drain chickpeas and transfer to food processor, adding the garlic, tahini, olive oil, lemon juice, cumin and 1/4 teaspoon of salt.
  7. Blend until smooth then add extra salt to taste.

Serve in a fancy bowl or on a pretty plate, drizzle with extra virgin olive oil and lightly dust with paprika. I love my hommus with crusty, grain-filled bread. It's also lovely with fresh sticks of celery or carrot.


Sunday, March 24, 2013

Tofu and Cypriot Halloumi Souvlaki
with Lemon and Oregano Marinade
Meat Free Week – Day Seven


Oh what a week! Seven straight days of eating carbless, vegetarian Greek food, and blogging about it every day. This has been harder than I thought it would be! Tony struggled with the overload of tofu, and I really pined for my carbs!

It was a difficult challenge for us but we also gained a lot. We really enjoyed spending some time with each other in the kitchen and sitting down and eating the same meal together. It was something we both missed over the years of cooking and eating separately. We realised that we only need make a few simple compromises to bring back some mutually enjoyable activity at dinner time so we will definitely be doing this a lot more in future.

Going without carbohydrates for the week was quite physically and mentally draining for me. Tony has been doing this for a while so he got through that part of it okay, but for someone who loves her bread, pasta and sweets, this was a real shock to the system. Tony kept reassuring me that after this week my body will readjust and I'll even start burning off some fat and feeling pretty good.

Sorry Tony, not happening. I'm baking bread tomorrow and I think I have to make a big batch of lentil soup, or something. Nothing beats good old high-carb comfort food :)

Tony will also be glad to have a break from tofu, but he is serious about giving up meat or fish at least one day a week from now on which is a wonderful outcome of his experience with Meat Free Week. As a participant, he also raised some money for animal protection organisation Voiceless this week which he's pretty chuffed about (thanks heaps to those who sponsored him!).

So tonight was the final night of our Meat Free/Carb Free Week. The last carbless, vegetarian Greek meal we'll be having together for a while I'm sure. Not to say that it wasn't an enjoyable meal, but I could really do with some baklava right about now. (Oh tomorrow, you couldn't come quick enough.)

The word "souvlaki" is Greek for "skewer" and anything, not necessarily meat, can be impaled by this skewer and grilled or barbecued over a high heat, resulting in a char-grilled stick of delights.

Traditionally, lamb or pork is used to make the street food souvlakis that most people are familiar with, but tonight we used tofu, halloumi and some vegetables, marinated in classic Greek roasting ingredients to produce another winner of a meal for this final night of Meat Free Week.

Did you know that non-animal rennet is used in the process of making both feta and halloumi cheese?


Tofu and Cypriot Halloumi Souvlaki with Lemon and Oregano Marinade


Serves 2 (two souvlakis per person)

Ingredients

  • 200g tofu, cubed into 12 pieces
  • 1 Lebanese eggplant, sliced into 8 pieces
  • 1 zucchini, sliced into 8 pieces
  • 4 large button mushrooms (5cm diameter), halved
  • 100g Cypriot halloumi, cubed into 8 pieces
  • 1/2 green capsicum, cut into 8 squares
  • 1 clove of garlic, cut into 12 small spears
For the marinade
  • 1/3 cup extra virgin olive oil
  • 3 tablespoons red wine vinegar
  • 3 tablespoons freshly squeezed lemon juice
  • 2 tablespoons dried oregano
  • Salt and pepper to taste
  • Extra lemon juice for serving

Instructions

  1. You will need 4 long skewers – mine are about 30cm long. Smaller skewers will be fine, but you will probably need to use 6 instead of 4.
  2. Carefully pierce each tofu cube half way with the end of a skewer, being careful not to split the tofu or go all the way through. Turning the skewer as you pierce helps. Remove skewer and insert a garlic spear into the hole you made with the skewer. Repeat for each cube of tofu.
  3. Place all the ingredients for the marinade in a pouring jug and mix well with a fork.
  4. For each skewer, carefully slide 2 pieces of capsicum, 3 cubes of tofu*, 2 pieces each of the zucchini and eggplant, 2 mushroom* halves and 2 cubes of halloumi* in an alternating pattern onto the skewer, starting with one piece of green capsicum, and ending with the other piece of capsicum.
  5. Lay souvlakis in a large oven dish and spoon marinade over each skewer. Allow to soak the juices for at least 20 minutes, turning the skewers once or twice to coat all over.
  6. Place oven dish under your oven griller on the second shelf (this is how I did them), grill over the barbecue, or fry in a large frying pan until charred on both sides. Which ever method you use, a high heat is necessary.
  7. Arrange souvlakis on plates, squeeze fresh lemon juice over the skewers and serve with a crisp, green salad. These souvlakis are also delicious with dollops of tzatziki all over them!

* The tofu, mushroom and halloumi have a tendency to split when pierced so slide these on with care, twisting the skewer as you push, very slowly.


Thank you again to everyone who sponsored Tony (it's actually not too late to still make a donation! Just click here to go straight to Tony's profile page on the Meat Free Week website), and thanks for all your support and kind words in the comments. It was really wonderful to know that so many people were interested in what we were doing this week :)

Oh, and I'm linking this post back to Veggie Mama's Meatless Mondays. This week she talks about how to win over your meat-eating partner with some wonderful veggie delights.

Saturday, March 23, 2013

Fire Roasted Pepper, Zucchini,
Broccoli and Mixed Olive Frittata
Meat Free Week – Day Six


I wanted to keep a green theme with this frittata, since we're not really supposed to be eating anything "red" during this Carb Free/Meat Free week – tomatoes, carrots, beetroot are all out – and yes, I know, we had stuffed red capsicums on Wednesday, but I needed a little deviation for the week to help me get used to going carbless!

Since then, instructions from Tony have been very clear that Lisa goes in the naughty corner if she tries to put anything else red in the meals this week. (Thank goodness he didn't notice the withered-away slices of tomato in last night's briam!)


After the success of last week's Greek Roasted Vegetable Frittata (not counting the fact it got drenched in rain the next day), we thought a high-protein, low-carb frittata for Meat Free/Carb Free week would make a lovely Saturday night meal.

Fire roasted peppers (capsicums) are used in quite a few Greek recipes. Many of the bottled fire roasted peppers you find in the stores are produced in Greece. The Greeks know how to fire roast their peppers! I discovered this last year in Limnos when my aunt Koula showed me how it's done.

Spray the pepper with oil, pierce it with a big fork and hover it over a gas stove flame for about 15 minutes!

It goes from looking like a regular pepper . . .


 . . . to looking like an alien.


The idea behind "fire roasting" a pepper in this way is that it is quick, and it keeps the vegetable intact so you can peel the skin and then slice it into rings, which was what I wanted to do for tonight's frittata.

You could just slice the uncooked capsicum into rings and place straight onto the frittata if you wish – it will still cook nicely in the final baking. But if you're like me and not a huge fan of capsicum skin, this step is worth it. And it's fun! Just be careful with the flame – oil will drip from the capsicum and when it comes in contact with the flame you'll experience a bit more fire action than you might want.

After the pepper has blackened, just pop it in a plastic bag to sweat for about 20 minutes, then when it's cool enough to handle you can easily remove the skin. It should be soft enough to flatten out a bit without breaking the flesh – it's easier to cut the rings if you flatten it.


The rest of the frittata recipe is a cinch, and I have to say, this one ended up tasting quite a bit better than the one I did last week. I used a deeper baking dish this time and cooked it at a slightly lower heat which resulted in a more moist frittata. I also added some cream to the egg mixture, and the olives imparted a zingy, salty contrast to the creaminess of the eggs. Very, very lovely :)

There is a lot of egg and cheese in this dish, and it may seem a lot for two people, but because of our low-carb diet this week we must make up for that in protein and fat for our energy. This is a lovely, indulgent meal but I would normally have something like this only once in a while.

We served up the frittata with a simple green salad of rocket leaves, avocado, celery, cucumber and pumpkin seeds, tossed in extra virgin olive oil and lemon juice.


Fire Roasted Pepper, Zucchini, Broccoli and Mixed Olive Frittata


Serves 2–4, depending on whether it will be an entree or a main meal

Ingredients

  • 1 fire roasted* green pepper, sliced into rings
  • 200g broccoli, finely chopped
  • 2 cloves garlic, crushed
  • 20 shelled pistachio nuts (optional)**
  • 1 large zucchini, cut into 1cm thick strips
  • 5 whole eggs
  • 3 egg whites
  • 1/3 cup cream
  • 1/4 cup grated sharp cheese
  • 100g feta cheese, crumbled
  • 2 tablespoons finely chopped parsley
  • 20 mixed olives, halved lengthways
  • Olive oil for frying

* See paragraph about fire roasting a pepper earlier in this post.
** We added the pistachio nuts, just because we had them. We couldn't really taste them in the frittata ;)

Instructions

  1. Fry broccoli in olive oil until starting to brown. Add garlic and pistachios and fry for another minute or so. Set aside.
  2. Spray zucchini strips with oil and fry or grill until golden brown on both sides. Set aside.
  3. Combine eggs, cream, cheeses and parsley in a bowl and whisk lightly.
  4. Pour a little of the egg mixture into a square baking dish (ours is 20cm x 20cm) and lay zucchini strips and spread broccoli mixture over the egg.
  5. Reserve five rings of your green pepper and 16 olive halves, and lay the remaining rings and olives into the dish, then pour in the rest of the egg mixture.
  6. Arrange your reserved pepper rings and olive halves in a pretty, symmetrical pattern over the egg mixture and bake for 45 minutes to one hour, until the top is golden brown and an inserted knife comes out clean.


Friday, March 22, 2013

Low-carb Greek Briam with
Goat's Feta and Cinnamon-Baked Tofu
Meat Free Week – Day Five


My partner Tony has been participating in Meat Free Week this week to raise money for animal protection organisation, Voiceless. Five days so far without meat and Tony's been doing it hard replacing his proteins with tofu. He can handle small doses of tofu but he needs to eat a lot of it to make up for the amount of protein that he normally consumes.

For nutritional reasons, Tony tries to maintain a low-carbohydrate diet, so he needs more protein and fat than the average person to make up his energy source. Unfortunately, this means he needs to eat some animal proteins like chicken and fish (he doesn't eat red meat) because tofu isn't enough for his needs, but he does his bit by only eating free-range products.

I respect and understand Tony's need to stay on this diet, however this morning he came to me with some very exciting news.

Inspired by his week of going without meat and trying some different recipes using tofu, he is taking the compassionate step to go meat/fish free one day a week from now on.

This is huge. Not just for Tony (and for me!) but for the animals, the planet and human health. Going without meat for just one day a week will save the lives of around 100 animals per year. It will also help towards improving the environment, reducing greenhouse gases, and lessening the chances of developing health problems such as cardiovascular disease, stroke, bowel cancer and obesity.

If you're interested in cutting down your meat consumption, there is a world-wide movement called Meat Free Mondays which might inspire you. Their website has lots of compelling reasons to cut meat out of your diet, and there are plenty of delicious recipes for you to try.

I have a recipe right here that you might be interested in too! And the added bonus of this version of Greek Briam is that it is low in carbs and tastes absolutely amazing! The creaminess of the goat's feta and exotic flavour of the cinnamon-baked tofu are a marriage made in heaven.


Low-carb Greek Briam with Goat's Feta and Cinnamon-Baked Tofu


The cinnamon-baked tofu recipe is adapted from a recipe for Cinnamon-Spiced Baked Tofu that I found on Macaroon and Artichoke's wonderful blog, The Food Duo.

Serves 2

Ingredients

  • 1 eggplant
  • 1 green capsicum
  • 1 zucchini
  • 2 sticks of celery, chopped in 1cm pieces
  • 4 cloves garlic, roughly chopped
  • 2 tablespoons fresh parsley, roughly chopped
  • 1/2 small onion
  • 1/2 small tomato
  • 1 teaspoon dried oregano
  • 100 ml Cretan extra virgin olive oil
  • 400 ml water
  • Salt and pepper to taste
  • 60g goat's feta cheese, cubed

For the Cinnamon-Baked Tofu
  • 200g tofu, cut into 1/2 cm thick bite-sized squares
  • 3 tablespoons balsamic vinegar
  • 3 tablespoons olive oil
  • 1/4 teaspoon cinnamon
  • 1/4 teaspoon dried oregano
  • Salt and pepper to taste

Instructions

  1. Slice the eggplant, capsicum and zucchini into round pieces, about 1 cm thick.
  2. Slice the onions and tomatoes into thin round pieces. There ain't much of these to veggies so cut them as thinly as possible to make them go as far as possible!
  3. Place all the briam ingredients in a medium-sized oven dish and bake in a pre-heated oven at 180 degrees celsius.
  4. While the briam is cooking, prepare the cinnamon tofu (see below).
  5. After 45 minutes, remove dish from the oven and use the back of a fork to press the vegetables down into the liquid.
  6. Turn oven up to 200 degrees celsius and place tray of tofu, and dish of vegetables back in the oven.
  7. After another 15 minutes, turn tofu and bake for 15 minutes more.
  8. Total cooking time is 1 hour and 15 minutes.
  9. Remove both trays from oven and dish out vegetables into serving bowls, topped with the tofu, then goat's feta.

Prepare the cinnamon tofu

  1. Place the balsamic vinegar, olive oil, cinnamon and oregano in a small bowl and mix well.
  2. Arrange tofu pieces in a small non-stick oven dish and pour marinade over tofu.
  3. Allow to marinate for 10 minutes then place in oven 30 minutes before briam has finished cooking, turning once after 15 minutes.


I really loved the low-carb tofu moussaka we had on Monday night, but tonight's Briam would have to now be our new highlight of the week. It was absolutely delicious.


Thursday, March 21, 2013

Tofu Greek Salad with Char-grilled Vegetables,
Rocket and Pistachios, and a Lemon Dill Dressing
Meat Free Week – Day Four


I'm addicted to pistachio nuts. Well, I'm sure I could develop an addiction to any nut really, but pistachios have a special don't-mess-with-me-when-I'm-eating-pistachios place in my heart.

Around 15 years ago when I was just a naive and ignorant young jet setter travelling around Egypt, I was a real wimp when it came to eating street food and didn't dare touch any of it. Luckily I had a bag of pistachio nuts from the Greek island of Aegina with me. For four days I survived on those pistachios. You'd think I'd get more sick from eating only nuts for four days than I would eating Egyptian street food. But these nuts got me through my ridiculous food phobia on that trip and I've loved them ever since.


Pistachio nuts have been cultivated in Aegina for over 150 years and they are like no other pistachio in the world. Because of the combination of a warm climate, rich volcanic soil and close proximity to the sea, they are larger nuts and with a more intense flavour. For this reason the island is now a Protected Designation of Origin and the nuts have been awarded the accolade of being a Protected Origin Product. Pistachio farming provides the island's population with its main source of income, with most of the pistachio trees naturally growing on small family estates.


It's difficult to find good pistachios here in Australia so I don't get the opportunity to use them much in cooking, but our local supermarket was having a special this week for 500g bags so I thought I'd give them another go. They weren't bad (of course I needed to munch down at least 45 of them to come to that conclusion) so I decided to adjust tonight's meal to include these lovely little salty gems.

Originally we were just going to put together a simple tofu Greek salad with some capsicum and a dill dressing, but after a bit of thought we realised a few other alterations were in order to make the salad substantial enough to have as a meal.

Melbourne's weather has been a bit horrendous today. We had some fierce storms, heavy rain and very strong winds... but I still made Tony go outside and fire up the barbecue so we could char-grill some vegetables for the salad. I must sound really mean, but truly, he actually wanted to. He loves any excuse to use his barbecue. It's a man thing, you know how it is.

So, some char-grilled veggies, tofu, rocket, feta and of course the pistachios would make up tonight's delicious salad with a lemon and dill dressing. The peppery rocket went really well with the charred flavour of the vegetables, and needless to say, lemon and dill always infuses well with feta-featured salads.


Tofu Greek Salad with Char-grilled Vegetables, Rocket and Pistachios, and a Lemon Dill Dressing


Serves 2 as a main meal

Ingredients

  • 1 eggplant, sliced into 1cm thick strips
  • 1 large zucchini, sliced into 1cm thick strips
  • Oil for char-grilling
  • 200g firm tofu, cut into wedges 1cm thick
  • 100g baby rocket (arugula) leaves
  • 60g feta cheese, crumbled
  • 30g shelled pistachio nuts
  • 2 tablespoons lemon juice
  • 2 tablespoons extra virgin olive oil
  • 2 tablespoons finely chopped dill
  • Salt and pepper to taste

Instructions

  1. Char-grill eggplant and zucchini strips on a barbecue or ridged griddle. Set aside to cool to room temperature.
  2. Fry or char-grill tofu wedges in a little oil and salt. Set aside to cool.
  3. Arrange rocket leaves in salad bowl, then tofu wedges, char-grilled vegetables, feta and pistachio nuts.
  4. Combine lemon juice, olive oil and dill and drizzle over salad.
  5. Add salt and pepper to taste.

We loved this salad. It had a great mix of salty, creamy, crunchy and soft which covers all bases as far as I'm concerned!


Wednesday, March 20, 2013

Red Capsicum Stuffed with Ricotta,
Caramelised Broccolini and Toasted Walnuts (Yemista)
Meat Free Week – Day Three


Vegetarian stuffed vegetables (Yemista), is a favourite dish among many Greeks, especially at this time of year during the Lent period. Stuffed with rice and herbs, it is often referred to as the king dish of Greek Lenten fare. You can find recipes for my take on rice stuffed tomatoes and ricotta and mint stuffed banana peppers elsewhere on this blog.

Tonight I'd like to share with you another Greek stuffed vegetable dish which is the perfect blend of low carbohydrates, a healthy amount of protein, and a whole lot of yum.

It's day three of Meat Free Week, with my non-vegetarian partner Tony going meat free and myself being a vegetarian going carb free. You can read more about why we're doing this here.

Ever since my last failed attempt at stuffing a vegetable with ricotta, I've been wanting to create a non-exploding, ricotta-filled yemista that also has a point of difference. Last week when Tony and I were putting our heads together to come up with our menu plan for this week, I asked him "What's something crunchy that you think might go well mixed with ricotta?" and he just blurted out "Walnuts".

Oh ho ho did that open the flood gates of ideas in my head – nutty, cheesy, crunchy, bitter, sweet, what else can I mix with that, oh yeah, caramelised broccolini, yummo, and lots of garlic and parsley, oh yes, yes. I could already taste it. This would be delicious.

Traditionally, wedges of potatoes are used in the bottom of the baking dish to prop up the stuffed vegetables and make sure they remain upright during cooking time. I still had some turnip left over from Monday's Low-carb Moussaka – remember what a neat little potato alternative turnips turned out to be? Well take one guess what I ended up using it for tonight. These would make the perfect little helpers to support the capsicums, and we couldn't wait to see how they tasted cooked this way.

The turnips came out beautifully. Their texture was not as potato-like as they were in the moussaka – without the starch they are a little juicier and didn't crisp up as much as a roasted potato does – but they tasted awesome. I'm definitely going to get turnip savvy over the next few months!

But the star of tonight's meal really took the show, both visually and flavourwise. Our walnut–ricotta filling was a definite hit and I can't wait to try it in filo pastry or perhaps make cheese croquettes with it.

Am I struggling without carbs? You bet I am. But during meal times I am savouring every moment that I have these beautiful flavours in my mouth – I forget all about the carbs and I just enjoy the time that Tony and I are spending together in the kitchen and at the table. He's having a hard time with all the tofu, protein powder and eggs that he needs to consume to make up his protein component, but he says it's also made him appreciate that there are plenty of flavour combinations that work very well with these proteins and in just three days he's already been really impressed with what we've come up with so far.

We served our Yemista tonight with a beautiful Green Greek Salad of mixed leaves, cucumber, blanched green beans, fresh basil, avocado and olives.


Red Capsicum Stuffed with Ricotta, Caramelised Broccolini and Toasted Walnuts (Yemista)


Serves 2

Ingredients

  • 1/3 cup olive oil
  • 2 medium, squarish red capsicums
  • 200g broccolini, finely chopped
  • 30g walnuts, roughly crumbled
  • 1 large clove of garlic, crushed
  • 250g fresh ricotta cheese
  • 1/4 cup of grated sharp cheese
  • 2 tablespoons fresh parsley, finely chopped
  • 1 egg, lightly beaten
  • Salt and pepper to taste
  • 1 turnip, peeled and cut into 4cm pieces

Instructions

  1. Fry broccolini on low–medium heat in a little oil until browned. Takes about 20 minutes. The volume of brocollini will reduce by almost half but don't be alarmed. The flavour is still all there!
  2. Add garlic and walnuts and fry for a couple of minutes.
  3. Place broccolini mixture, ricotta, sharp cheese and parsley in a medium bowl and combine well. Add salt and pepper to taste, then add egg. Mix well.
  4. Cut tops off capsicums and discard. Remove seeds and membranes from inside of capsicums.
  5. Add oil to a small baking dish, roll capsicum shells in oil to coat and sit them upright in the dish.
  6. Arrange turnip pieces around capsicum shells to prevent the capsicums from tipping over. Use spray olive oil to coat the turnip pieces with oil.
  7. Fill capsicum shells with cheese stuffing and bake for 1 hour at 180 degrees celsius or until cheese filling begins to brown on top.